|
|
Post by jonbanke on Sept 3, 2013 21:21:19 GMT -5
Hello everyone,
Over the last several years I have had the strong desire to build a Hollow Wood Surfboard. My interest in building a board peaked this summer and I decided to stop simply reading about it and to give it a shot and try to build one. I have never built/shaped/glassed a surfboard of any kind before this project.
After lots of Surfboard forum reading and Google searching, I settled on plans from Timeless, the Performance Long board.
I have already built my board but have yet to glass it at the time of this message. I will post some pictures from my build along with some lessons I learned along the way. I made quite a few mistakes, but was able to work through most of them and keep the project going.
I
|
|
|
|
Post by jonbanke on Sept 3, 2013 21:44:29 GMT -5
After downloading the plans, I went to Kinko's and had them print out the template. It was $.75/square foot, so all together it was $7.50 for my plan. I was fortunate because the first printout came out slightly smeared, so the Kinko's employee gave me that copy for free, which I was able to use for reference.
I cut the template out and used spray glue to adhere it to the plywood. Just a tip, if you want the paper off of your cutout, I'd scrape it off immediately after cutting out your ribs and spar. I did not get it off soon enough and several of my pieces had some paper left over.
Lesson learned from this step was that it is very important to cut out the ribs and spar PERFECTLY. It sounds obvious, but what I realized during this build is that I had a difficult time envisioning each step of the build until I physically built it (ribs/spar, rails, bottom, etc.) Many of my own questions were answered as I built the steps and were able to physically see each step come to life. I say this because I realized that a few of my imperfect rib cuts caused me some headache later on down the road into the build with rail line up and bottom deck glue up.
What I should have done on the couple of imperfect ribs is just cut new ones, but I rushed and thought I would be able to work around it (this might be a recurring theme you see throughout my build.)
|
|
|
|
Post by jonbanke on Sept 3, 2013 21:55:21 GMT -5
Sorry, I'm having a hard time posting pictures for some reason
|
|
|
|
Post by jonbanke on Sept 4, 2013 10:33:22 GMT -5
I am going to try this one more time.....I uploaded some photos to Photobucket, I am going to try to post a summary of my build with photos. To begin, here is a picture of my board after rough shaping and sanding. I still need to do some fine sanding on it and finer shaping, but this is the general idea of the board before glass.  |
|
|
|
Post by jonbanke on Sept 4, 2013 10:38:06 GMT -5
As I mentioned in earlier posts, I printed out the template at Kinko's on a roll of paper, cut it out via scissors, spray glued the paper cutout to the appropriate plywood or underlayment, and then cut out each piece with my cheap jigsaw. I think a bandsaw would do much better on this, and a bit more patience with my jigsaw would have probably helped me a lot. I am linking three photos on this post 1) The paper template laying out 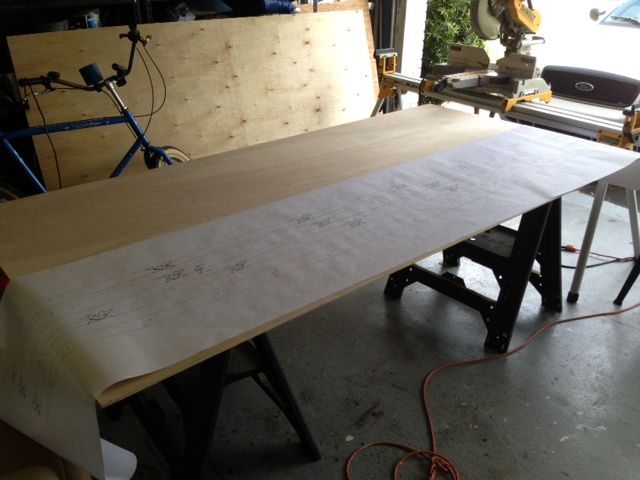 2) Some of the glued up paper cut outs before cutting 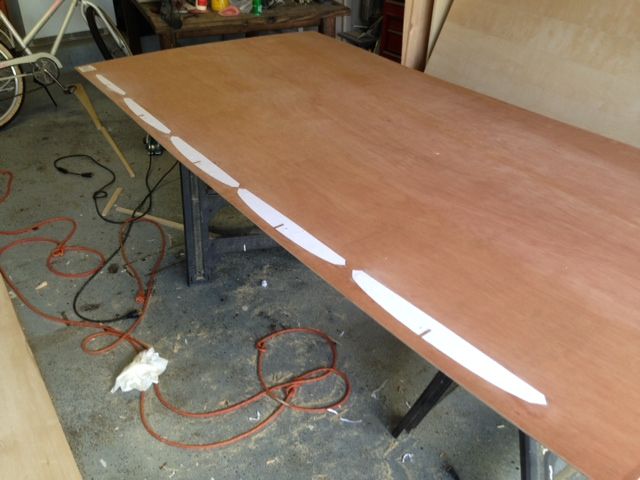 3)The spar and ribs cut out and roughly fit together lying on my garage floor. At this point I could BARELY begin to envision a board 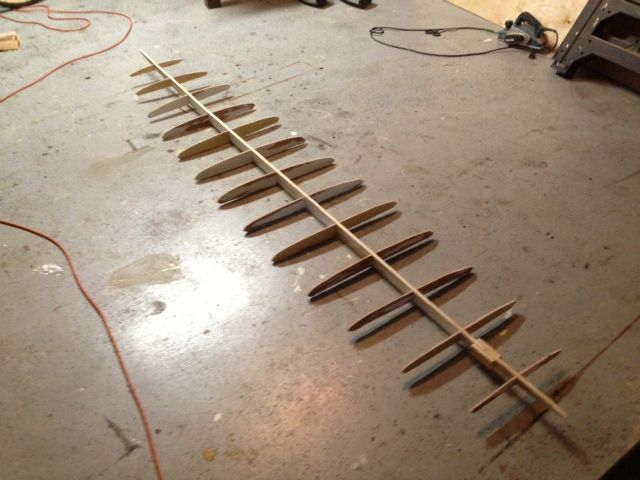 |
|
|
|
Post by jonbanke on Sept 4, 2013 10:48:14 GMT -5
I then proceeded with the bottom deck of the board. My board is made out of Western Red Cedar and Basswood, which I obtained from Shell Lumber in Miami, Florida. The reasons I chose these two woods are because they are readily available near where I live, they are relatively inexpensive, they both seem to have similar hardnesses, and I saw them both used on wood surfboards while doing google searches. The steps I took to make the bottom were to 1) Use my table saw to cut narrow/various strips of wood into what I thought were appealing looking widths 2) Bookmatch each board by running them through my table saw, splitting the board in two by cutting them down the length of the board and folding them open. This is more work but is a nice way to use less lumber overall in the project and it definitely looks cooler in my humble opinion. 3) Use my bench planer to send each piece through so that they are all of equal thickness. Lesson learned is that I wish I had more clamps, I think this would have gone faster if I did. I glued my bottom up in four total steps, glueing up three groups of boards, one group at a time, and finally all three groups together to complete the bottom. Use whatever you can, but clamps or something similar are a must. I have seen Plastic wrap and ratchet straps used on other projects, but I stuck mostly with clamps. As you can see, I also used some items to weigh down the 2x4's that I had lying around the garage. This step went pretty smooth, it was just time consuming. 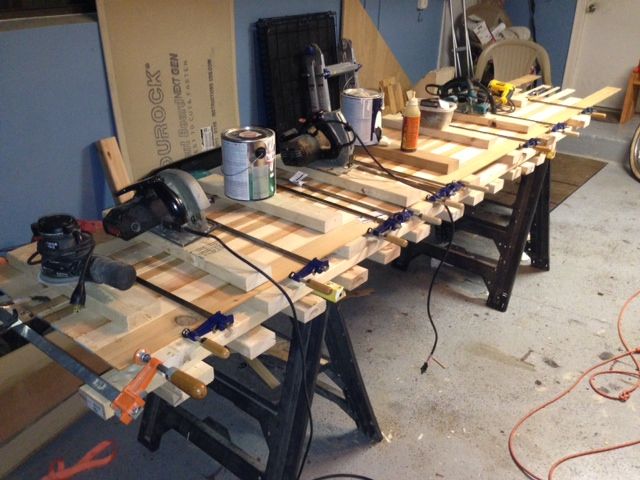 I did not take any picture of the "skeleton" adhering to the bottom, but I do have this picture of the bottom roughly cut out the shape of the board and the first rail going on.  |
|
|
|
Post by jonbanke on Sept 4, 2013 10:55:20 GMT -5
The next long step were the rails. I wish I would have taken more overall pictures at this point. I used Basswood triangle strips for the rails and cut 3/4" triangle strips using my table saw. The blade was angled at 45 degrees. This is an important step, a VERY important step to get right. Make sure your triangle strips are cut right, if not then save them for repair/scrap glue in pieces. This caused me some headache, but here is a picture of the rails planed down and ready to almost receive the skin. This picture also shows part of the inside elements work done.  The next picture shows the board before the top deck is on, but after essentially all of the inside element work is complete. I used triangle strip pieces from bad rails that weren't cut right. I added a couple more pieces after this picture was taken. As you can see, one of the ribs was not cut square and lies at a slight angle after the glue up. It didn't alter the rail line up significantly so I did not fret over it much. 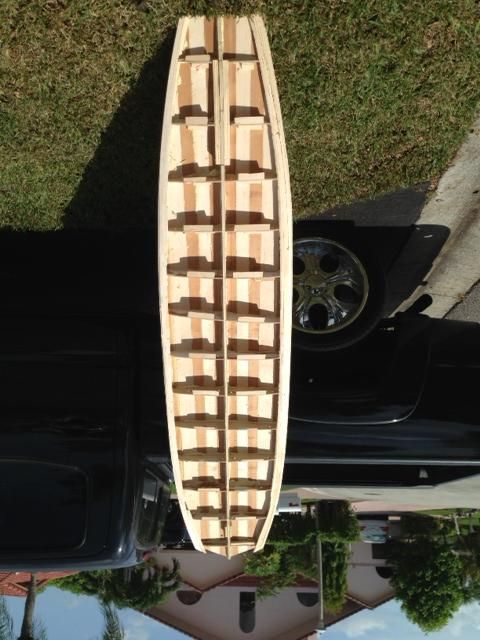 |
|
|
|
Post by jonbanke on Sept 4, 2013 11:06:09 GMT -5
I forgot to mention in the above post, the fin box reinforcement wood was a piece of 1x4 Radiata Pine that I had available at home. I then planed it flush with the spar and it seemed to work fine. I then proceeded to the top deck skin work up. I followed a similar process as the bottom with the layout, cutout, glue up, etc. I then proceeded to cut out deck around the rail profile as instructed so it would be easy to clamp down at glue up. 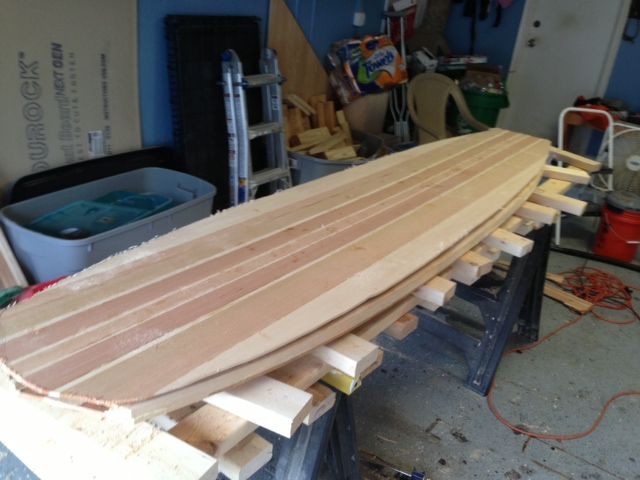 I then prepared for deck glue up to the rails and skeleton, which had me nervous but excited at the same time. As I mentioned in earlier posts, I wish I had more clamps. I had 15 or so 2" spring clamps and about a dozen 24" bar clamps and it was not enough. I wish I had 15 more spring clamps to be honest and twice as many bar clamps. I should have bit the bullet and purchased more of them (or borrowed, whatever). It would have made a big difference. Because of my lack of clamps, I had to use other methods to weigh down the deck so it would properly glue to the ribs/spar/rails. I used every "weight" I could find to keep things down and in place. 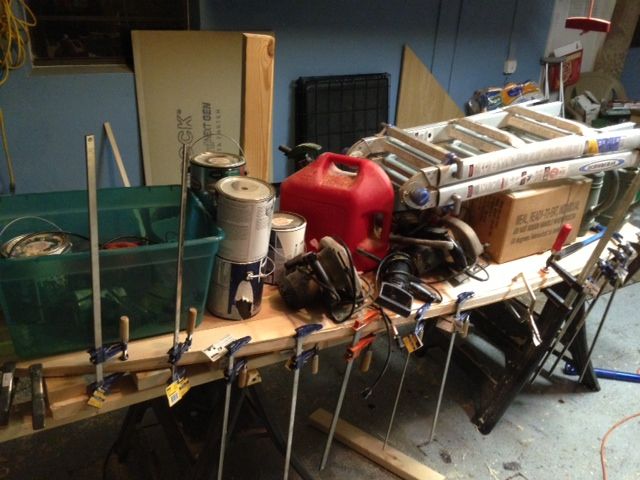 This was easily the biggest "bonehead" move of the project. Instead of being patient/buying more clamps/thinking it through better, I rushed it and set up all of these heavy "weights" on my surf board and rocker jig. As you can see now, all of this weight on two cheap plastic sawhorses, which in my excitement/focus on getting the deck glued properly, I did not notice were flexing quite a bit. About 30 minutes went by and all of the sudden I heard a loud "snap" and the rocker jig, board, and all of the weights and clamps came crashing down onto my floor. My board took the brunt of the weight, which made me almost sick to my stomach instantly. 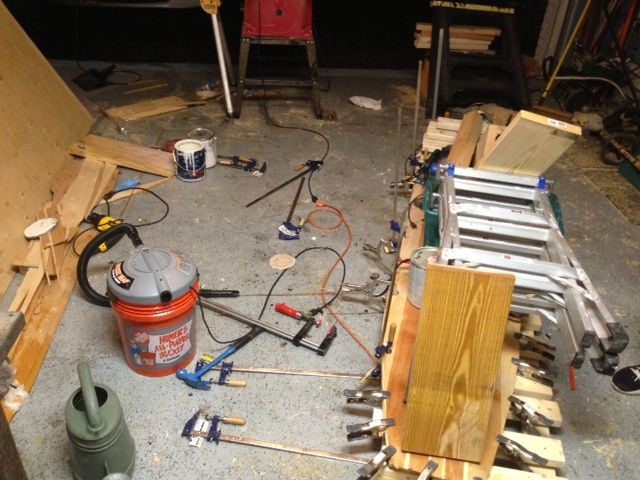 I feel foolish posting this, but perhaps someone can learn from my mistake. After a quick heart attack, I looked over the board quickly and noticed that most of the Gorilla Glue had already began to go off pretty well and actually held the board and deck down during this near catastrophe. The biggest impact was a separation in two deck boards. The separation was about 24" long in total and about .5 cm at its maximum, getting smaller as it goes. Again, I was impatient, and did not let the top deck sit overnight. It probably sat 4 or 5 hours before I tried this glue up, so, along with ALL of the force of this weight and the fall, the glue on the top deck had not 100% cured. 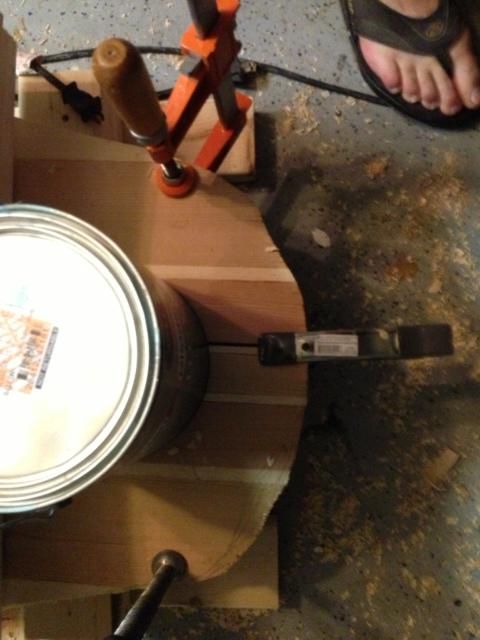 In a strange way, the limited amount of damage actually made me feel good and gave me confidence in the strength of the board. Again, lesson learned, do not rush this! |
|
|
|
Post by jonbanke on Sept 4, 2013 11:16:50 GMT -5
To fix the gap in the deck, I cut a small sliver of cedar wood and planed/sanded it down so I could squeeze it in the gap. I also made some homemade wood filler (cedar sawdust and Titebond 3 glue) and pressed/glued the piece into place. After it dried, it was hardly noticeable. Two different neighbors standing over the board did not notice it until I pointed it out to them. I then glued on tail and nose blocks and let them dry throughout the day before beginning any planing and shaping (note these are In progress pictures) 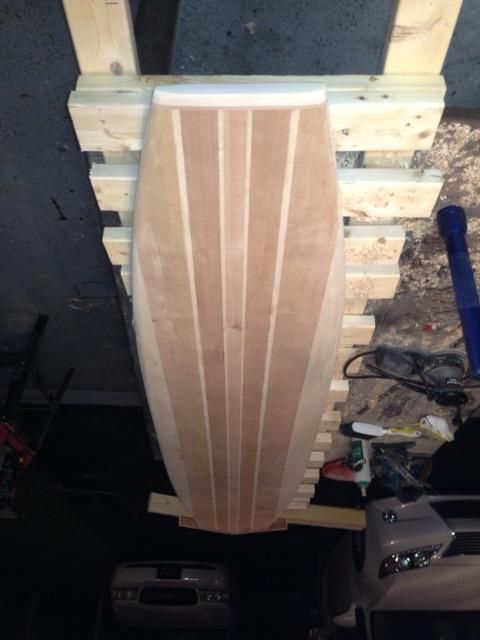 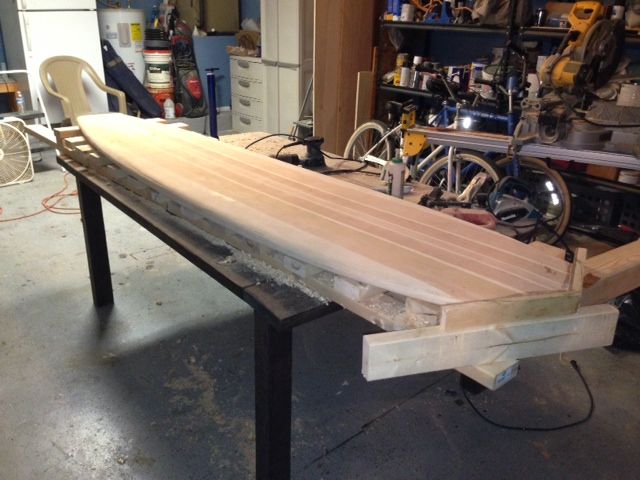 I did not take too many pictures of the shaping process, but I followed the advice in teh book for the most part and things seemed to shape out pretty evenly. I used the following tools to shape 1) Power Hand Planer 2) 12" Hand Planer 3) 6" Hand Planer 4) Orbital Sander 5) Block Sander 6) A sheet of sandpaper and my bare hands in a few tiny spots Whether or not this is the appropriate types of tools, it seemed to work out fairly well for me. My only regret at this point was making my nose block stock too thin. If I would have made them thicker to begin with, I would have had more material available to me to shape, and thus, I would have been able to make a more gradual curve in the nose. I wanted to keep it simple for my first board, so I used a very basic set up of leftover scrap deck boards for the cedar in the blocks and a little bit of leftover Basswood stock. |
|
|
|
Post by jonbanke on Sept 4, 2013 11:22:33 GMT -5
On the night of shaping, I was so excited I worked until almost midnight in the garage. Once I thought I had it right, I wiped it down thoroughly and took it in the house for a few pictures. The main picture to start the forum is one, and here is another I took before taking the board back out to the garage for me sanding. 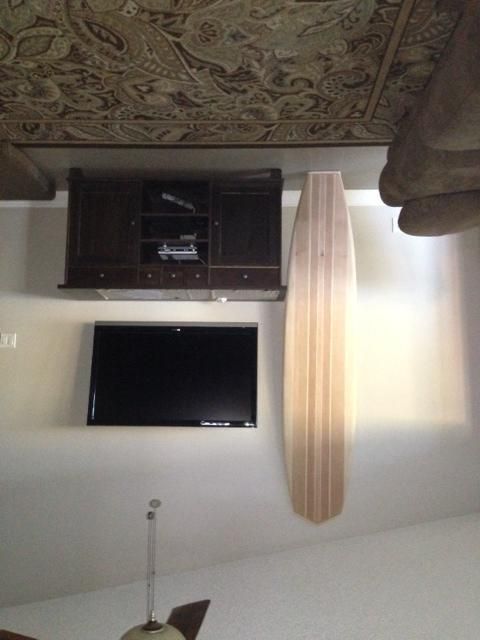 It is 8 feet, 8 inches tall. I wanted it a bit shorter than 9, so I cut off a little bit more nose and tail prior to the blocks going on than probably normal. I also used nose and tail blocks which weren't particularly thick, which contributed to the size. I am very happy with the size. I am going to be meeting with a local glasser/shaper about glassing the board in the next few days. I have yet to add a vent, that will be done in the next day or so. I have also yet to make a fin, I need to do that as well in the next few days. I will post some follow up pictures once it is glassed and also answer any questions/clarify anything from my build if questions are posted on here. In the coming weeks, I plan on building Chad's mini longboard design for my wife, I will better document that build as I go as an in progress forum thread. Thanks! |
|
|
|
Post by TimelessSurf on Sept 4, 2013 14:20:04 GMT -5
Cool! Thanks for the documentation! Lookin' good!
|
|
|
|
Post by jonbanke on Sept 8, 2013 14:27:13 GMT -5
I weighed my board on a scale I had in my bathroom....
21.2 pounds before glass or fin
|
|
|
|
Post by jonbanke on Sept 26, 2013 12:44:22 GMT -5
About a week ago I finished the glassing process and the board is now 100% ready to go! After finishing the shaping, I decided to take the board to Bird Surfboards in Deerfield Beach, Florida after a few recommendations from local shops. I met with Mr. Mike who founded Bird over 25 years ago and had him look over my board and offer some shaping tips. We did some cleanup shaping work on the board. He agreed to allow me to participate in the glassing process, and we worked on it together. He did a lot of the work, but did let me get my hands dirty and be a big part of the process as well. He would usually do about half of a task and then let me take over and I'd finish with his guidance. He would explain everything as we went as well, it was almost a teacher/student type thing but very easy and relaxed at the same time. I am very happy I did the glasswork at Bird Surfboards and not at home or DIY, it would have been too much for me to handle and way over my head for a first time. I took some photos of the process, but not as many as I wish I would have. The problem with photos during the process though was that I was usually covered in fiberglass dust or resin and did not want to really touch my phone, it was always too dusty/sticky/messy. The first step was to make sure the board was super clean and then roll out the cloth. We used 6oz. cloth, one layer on the bottom and two layers on the deck. 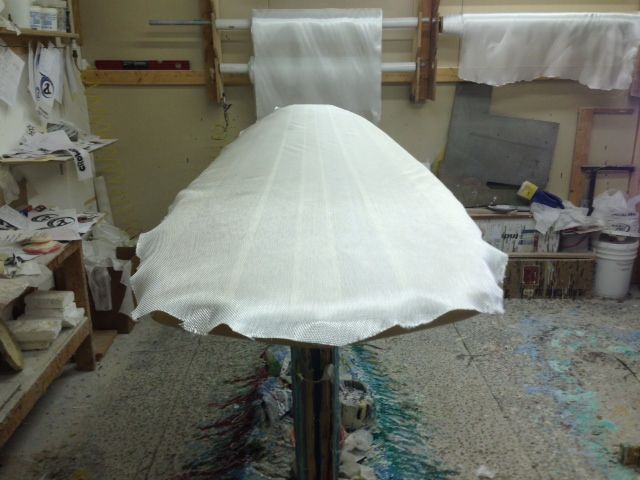 We user solar polyester resin throughout, and it worked like a charm. It really was amazing to see the resin harden up in just a few minutes out in the Sun. We would set the board on a rack in the shade and it would partially cure, then we would move it into more direct sun light so it would fully cure. I was told this was to prevent shrinking of the resin.  The gloss coat was when the board really started looking awesome. It should be noted there is an incredible amount of sanding/grinding involved in this whole process to get the board to where it needs to be. Every little disturbance in the resin/cloth/etc. had to be removed and perfected clean before moving on. I'm talking hours and hours of sanding.. 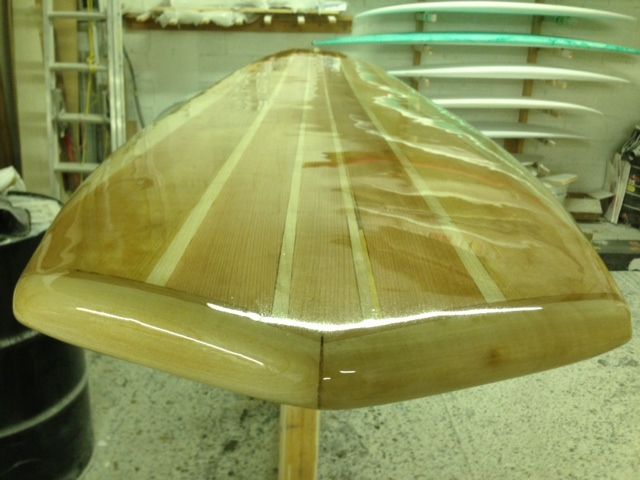 A leash bridge was fun and easy, we used really heavy cloth and a plastic straw to make it. Its simple and effective and looks cool, IMHO 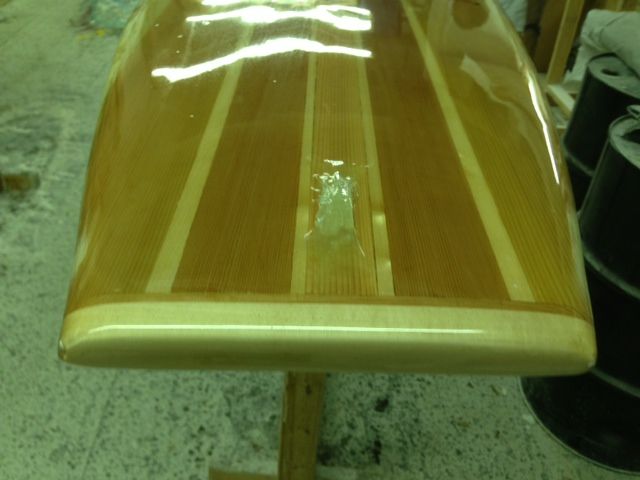 I made a checkerboard pattern fin. I found the instructions on Swaylocks or the Tree to Sea Forum, it was under a Completed Fin type thread. I saw Gallagher Surfboards posted easy instructions on the checkerboard pattern, and it was pretty simple to do. I then just eyeballed the fin and drew my own pattern. It turned out to be fairly close to a template Bird had for a fin, so we used the template at that point to clean it up, foil it, and then glass it straight on the board. 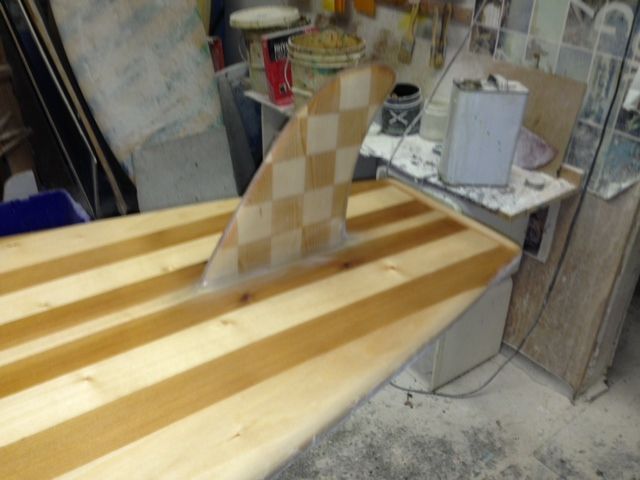 The wet sanding and high polish was a ton of work but it was very rewarding to watch the shine come out of the board and have it ready to go. 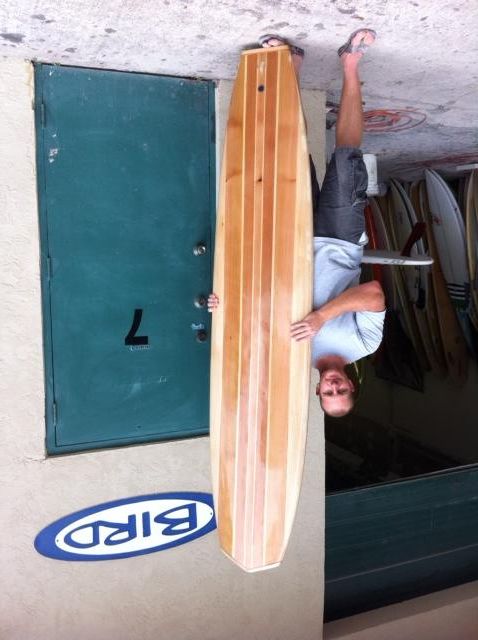 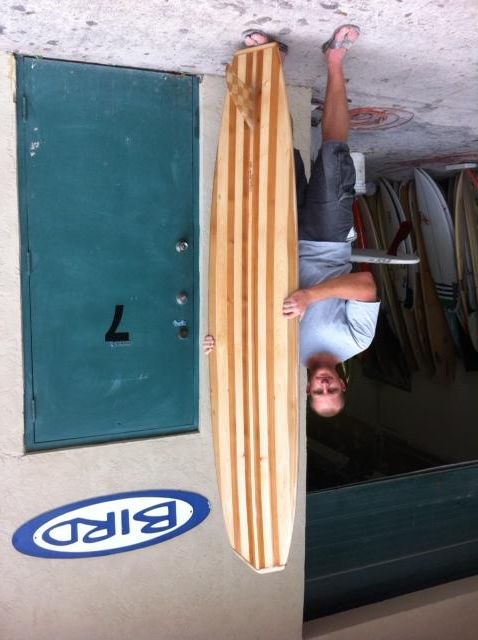 As for the vent, if you can see in the final picture of the top deck, a small black vent above the leash bridge. I used a Goretex breathable vent that Mr. Mike from Bird Surfboards recommended. The Goretex membrane is made to allow air to pass through but not water, so essentially it is always "breathing" whether it is in the water or not. He had a jig ready and the vents in stock. It took just a couple of minutes to get the vent in place. I really like my board and hope to have it out this weekend for the first time. If you are in Florida, I would recommend checking out Bird Surfboards if you are going to try this process, it made things super easy. I now have the bug and want to build another board! It'll be either another longboard next or a SUP, we'll see. |
|

